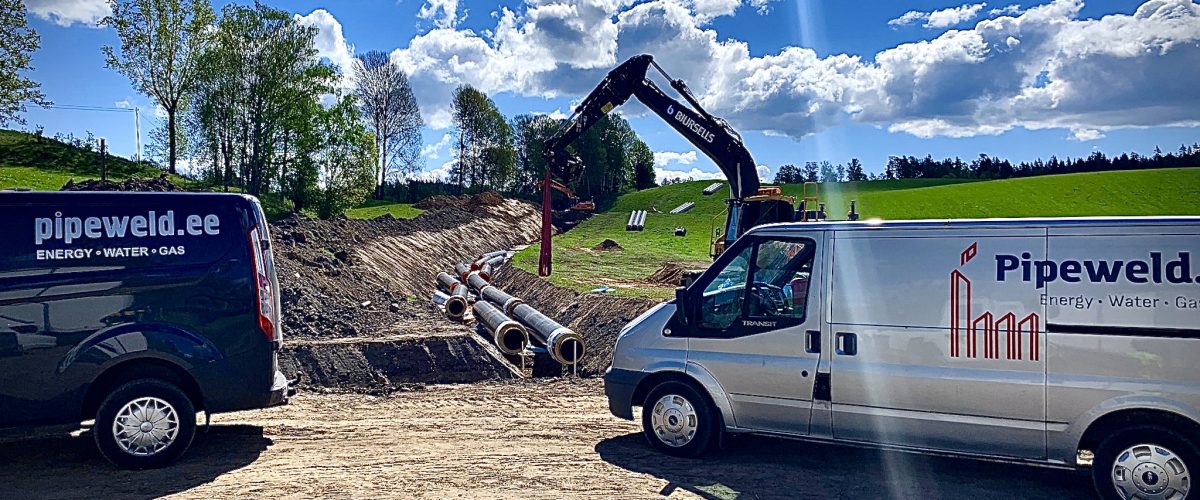
The industrial pipework contractor is crucial to the success of the 12 km DN 600 district heating pipeline upgrade in Jönköping
The city is growing and requires more heat
The new district heating pipeline project in Jönköping, Sweden is a crucial step towards providing more heat to a growing city. Led by Jönköping Energi, the project aims to improve the energy efficiency and reliability of the city’s district heating system.
Flexibility is key in large-scale pipework contracts
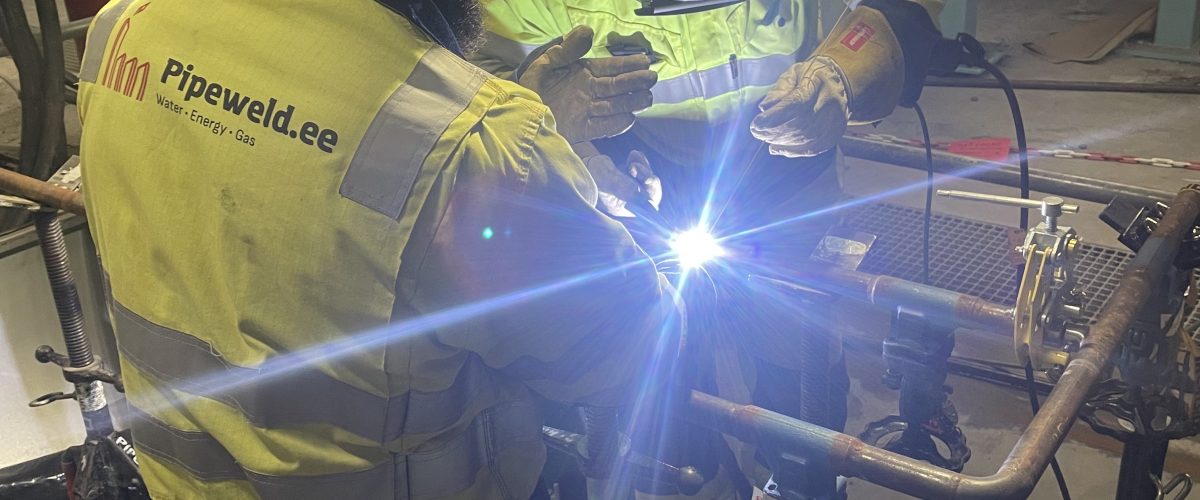
One of the most important factors in the success of this district heating project is the choice of a flexible and experienced pipework contractor with a proven track record in the field of welding, as well as certifications that demonstrate their competence as coded welders.
An experienced and certified contractor, with coded welders, will ensure that the pipework and welding work is completed to the highest standards, meeting all safety and quality requirements. This will help to prevent delays, and ensure the longevity and reliability of the new district heating pipeline.
On the other hand, if a contractor without the necessary skills and certifications is chosen, the results could be disastrous. The work could be of poor quality, resulting in leaks and other problems in the pipework. Additionally, there could be safety hazards, and the district heating project could be delayed.
In conclusion, it’s essential to emphasize the significance of selecting a qualified, experienced, and certified contractor for such a crucial infrastructure project. It’s not only important for the success of the district heating project but also for the safety and well-being of the community. It’s a reminder to always prioritize the quality and safety when it comes to projects like this.
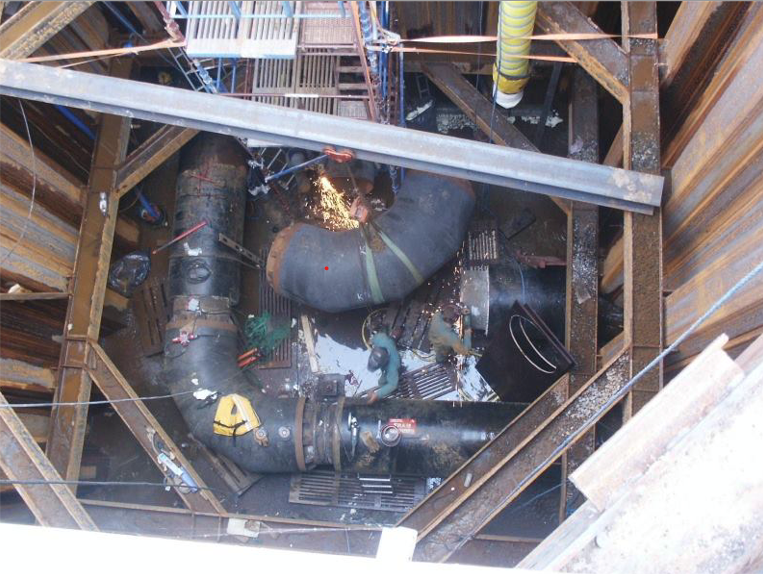
The project involved the installation of a new steam turbine in a power plant, showcasing the complexity and importance of proper planning and organization in large-scale energy projects. Upon receiving a request for assistance with the installation and welding of industrial pipe from the main contractor, Hjalmarssons, PipeWeld.ee quickly mobilized to the job site with all necessary equipment.
Digitalization in Large-Scale Industrial Pipe Projects
The team faced initial challenges in locating and identifying the correct pipe parts, but was able to streamline the process by creating a digital registry of all pipe spools and training subcontractors on its use. This reduced the average time for finding and accessing industrial pipe parts from three hours to just 15 minutes.
With these logistical issues resolved, the team moved on to the welding and installation phase, which went smoothly thanks to their expertise and experience in industrial pipe projects. At the conclusion of the project, the client praised PipeWeld.ee for their efficiency and attention to detail, highlighting the importance of investing in proper planning and organization in power plant projects from the outset.
Punch-out process
At the end of the project, PipeWeld.ee was asked to lead the punch-out process, a thorough inspection of all 500 lines already installed to ensure compliance with the project drawings. Although not a complex task, it required a high level of attention to detail and accuracy to ensure that all lines were installed correctly. Our team took on this responsibility with great care, working closely with the client and other contractors to ensure that all lines met project specifications.
This final step was crucial to the power plant project’s success, as it ensured that the plant would operate safely and efficiently. Overall, the project was a great success for PipeWeld.ee, demonstrating the company’s ability to handle large-scale energy projects with a high degree of efficiency and attention to detail in industrial pipe work. The company’s focus on proper planning and organization, along with its expertise in industrial pipe installations, were key factors in the power plant project’s success.
Tie-in point with an elbow into the fixed pipe strings of the pipeline (dead legs)
What Are Overlap Connection and Tie-In?
Overlap Connection (in the context of pipeline installation)
An overlap connection is the joining of two pipeline sections at a technological gap.
An overlap connection is a circumferential joint connecting pipe strings after they have been laid in their design position and backfilled.
From the given definitions, the second one appears to be more accurate.
Origin
The term “overlap connection” evidently comes from the technique where one pipe string is placed over another before a specialist performs marking, cutting, and welding of the pipeline.
Note: An overlap connection always refers to the connection of straight pipe strings.
Tie-In
In the context of pipeline installation, a tie-in is the process of creating a new branch or connecting to an existing pipeline.
A tie-in is a specialized welded connection performed during the construction or repair of an oil pipeline, directly linking the main pipe to a branch.
Additional Information:
A tie-in can be performed either under operating pressure or with a complete pressure release in the mainline. It can be executed using elbows, tees, straight pipe sections, or inserts when replacing a pipe segment, as well as other specialized fittings.
In our case, the technology is applied exclusively with a complete shutdown of the mainline during the tie-in process. However, tie-ins can also involve inserts, tees, elbows, reducers, valves, and other components.
Note: The technology described below can be used for both tie-ins and overlap connections.
Overlap Tie – in Technology Benefits
Accurate fit with minimal pipe stress
High installation speed
Risks to miss = 0
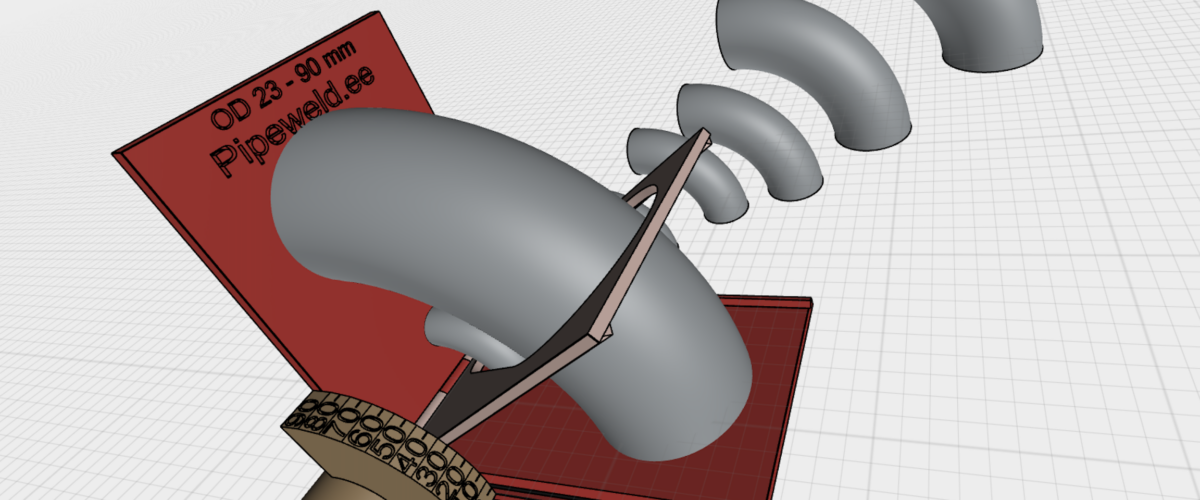
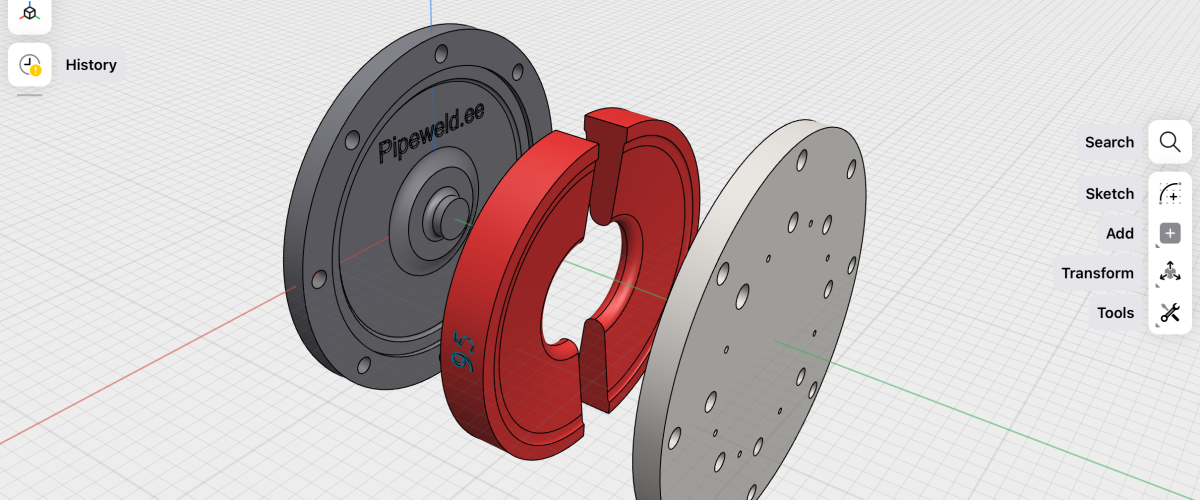
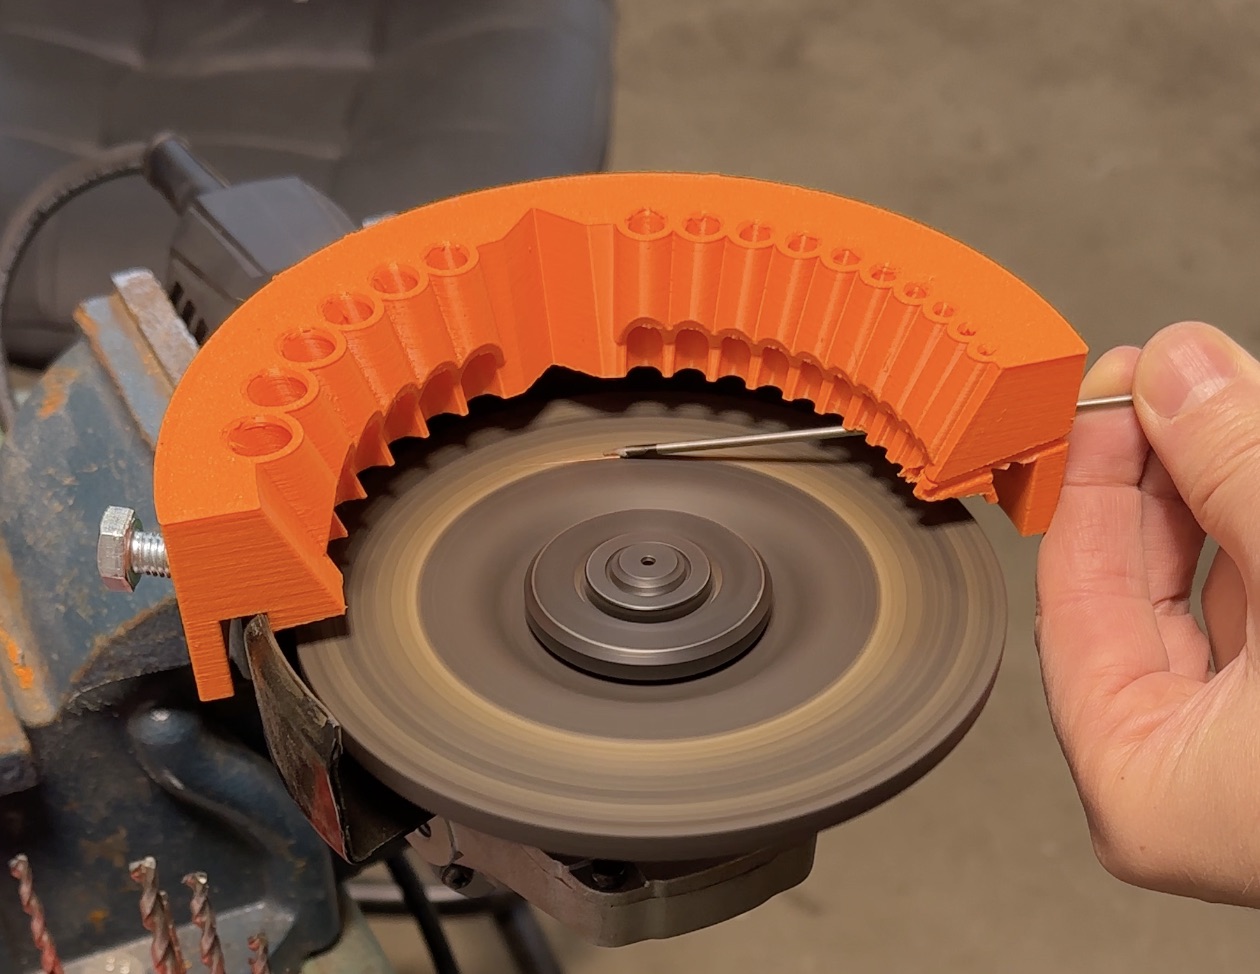
1. Preparation to tie-in a bend into a technological piping spool
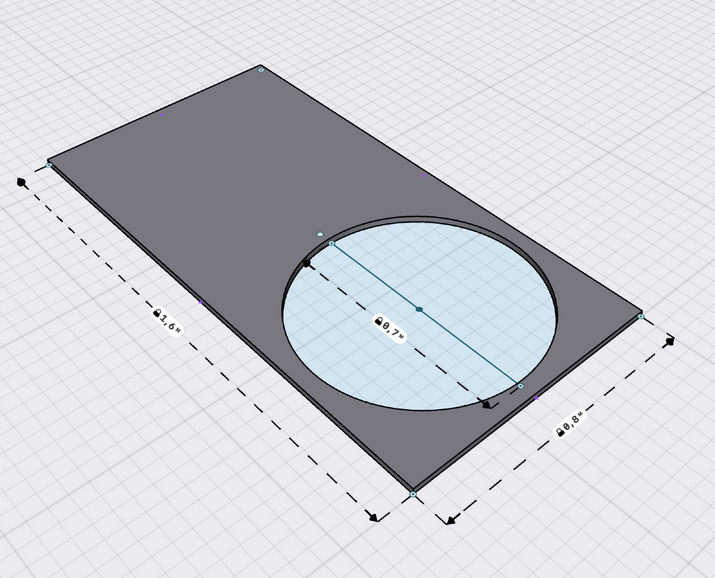
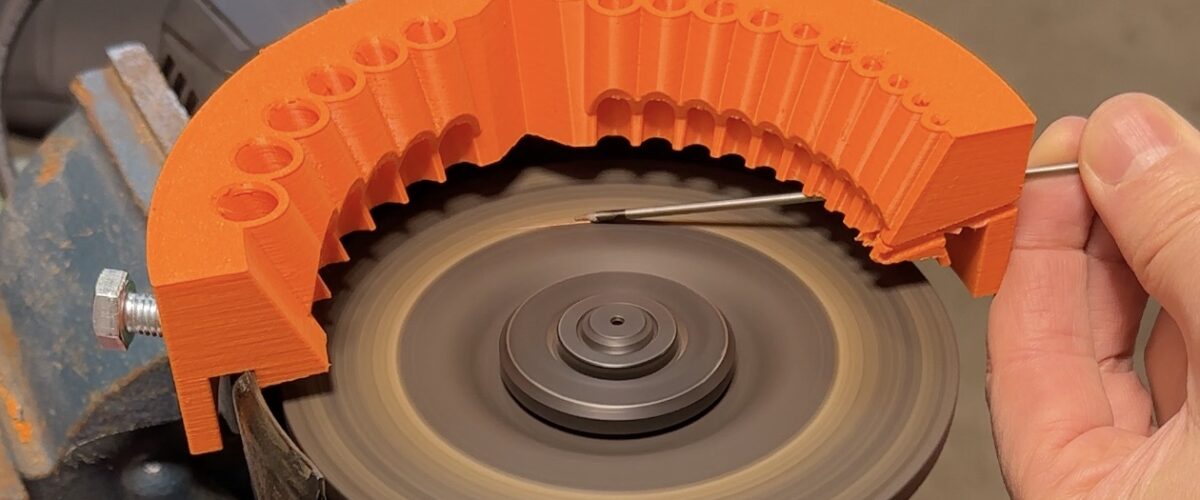
You need to cut out two sights from flat plywood.
The sight, made of plywood 14 – 20mm thick, must be at least 100mm longer than the diameter of the pipeline in width and twice + 100mm in length.
Tip – always check the straightness of the sight before using it.
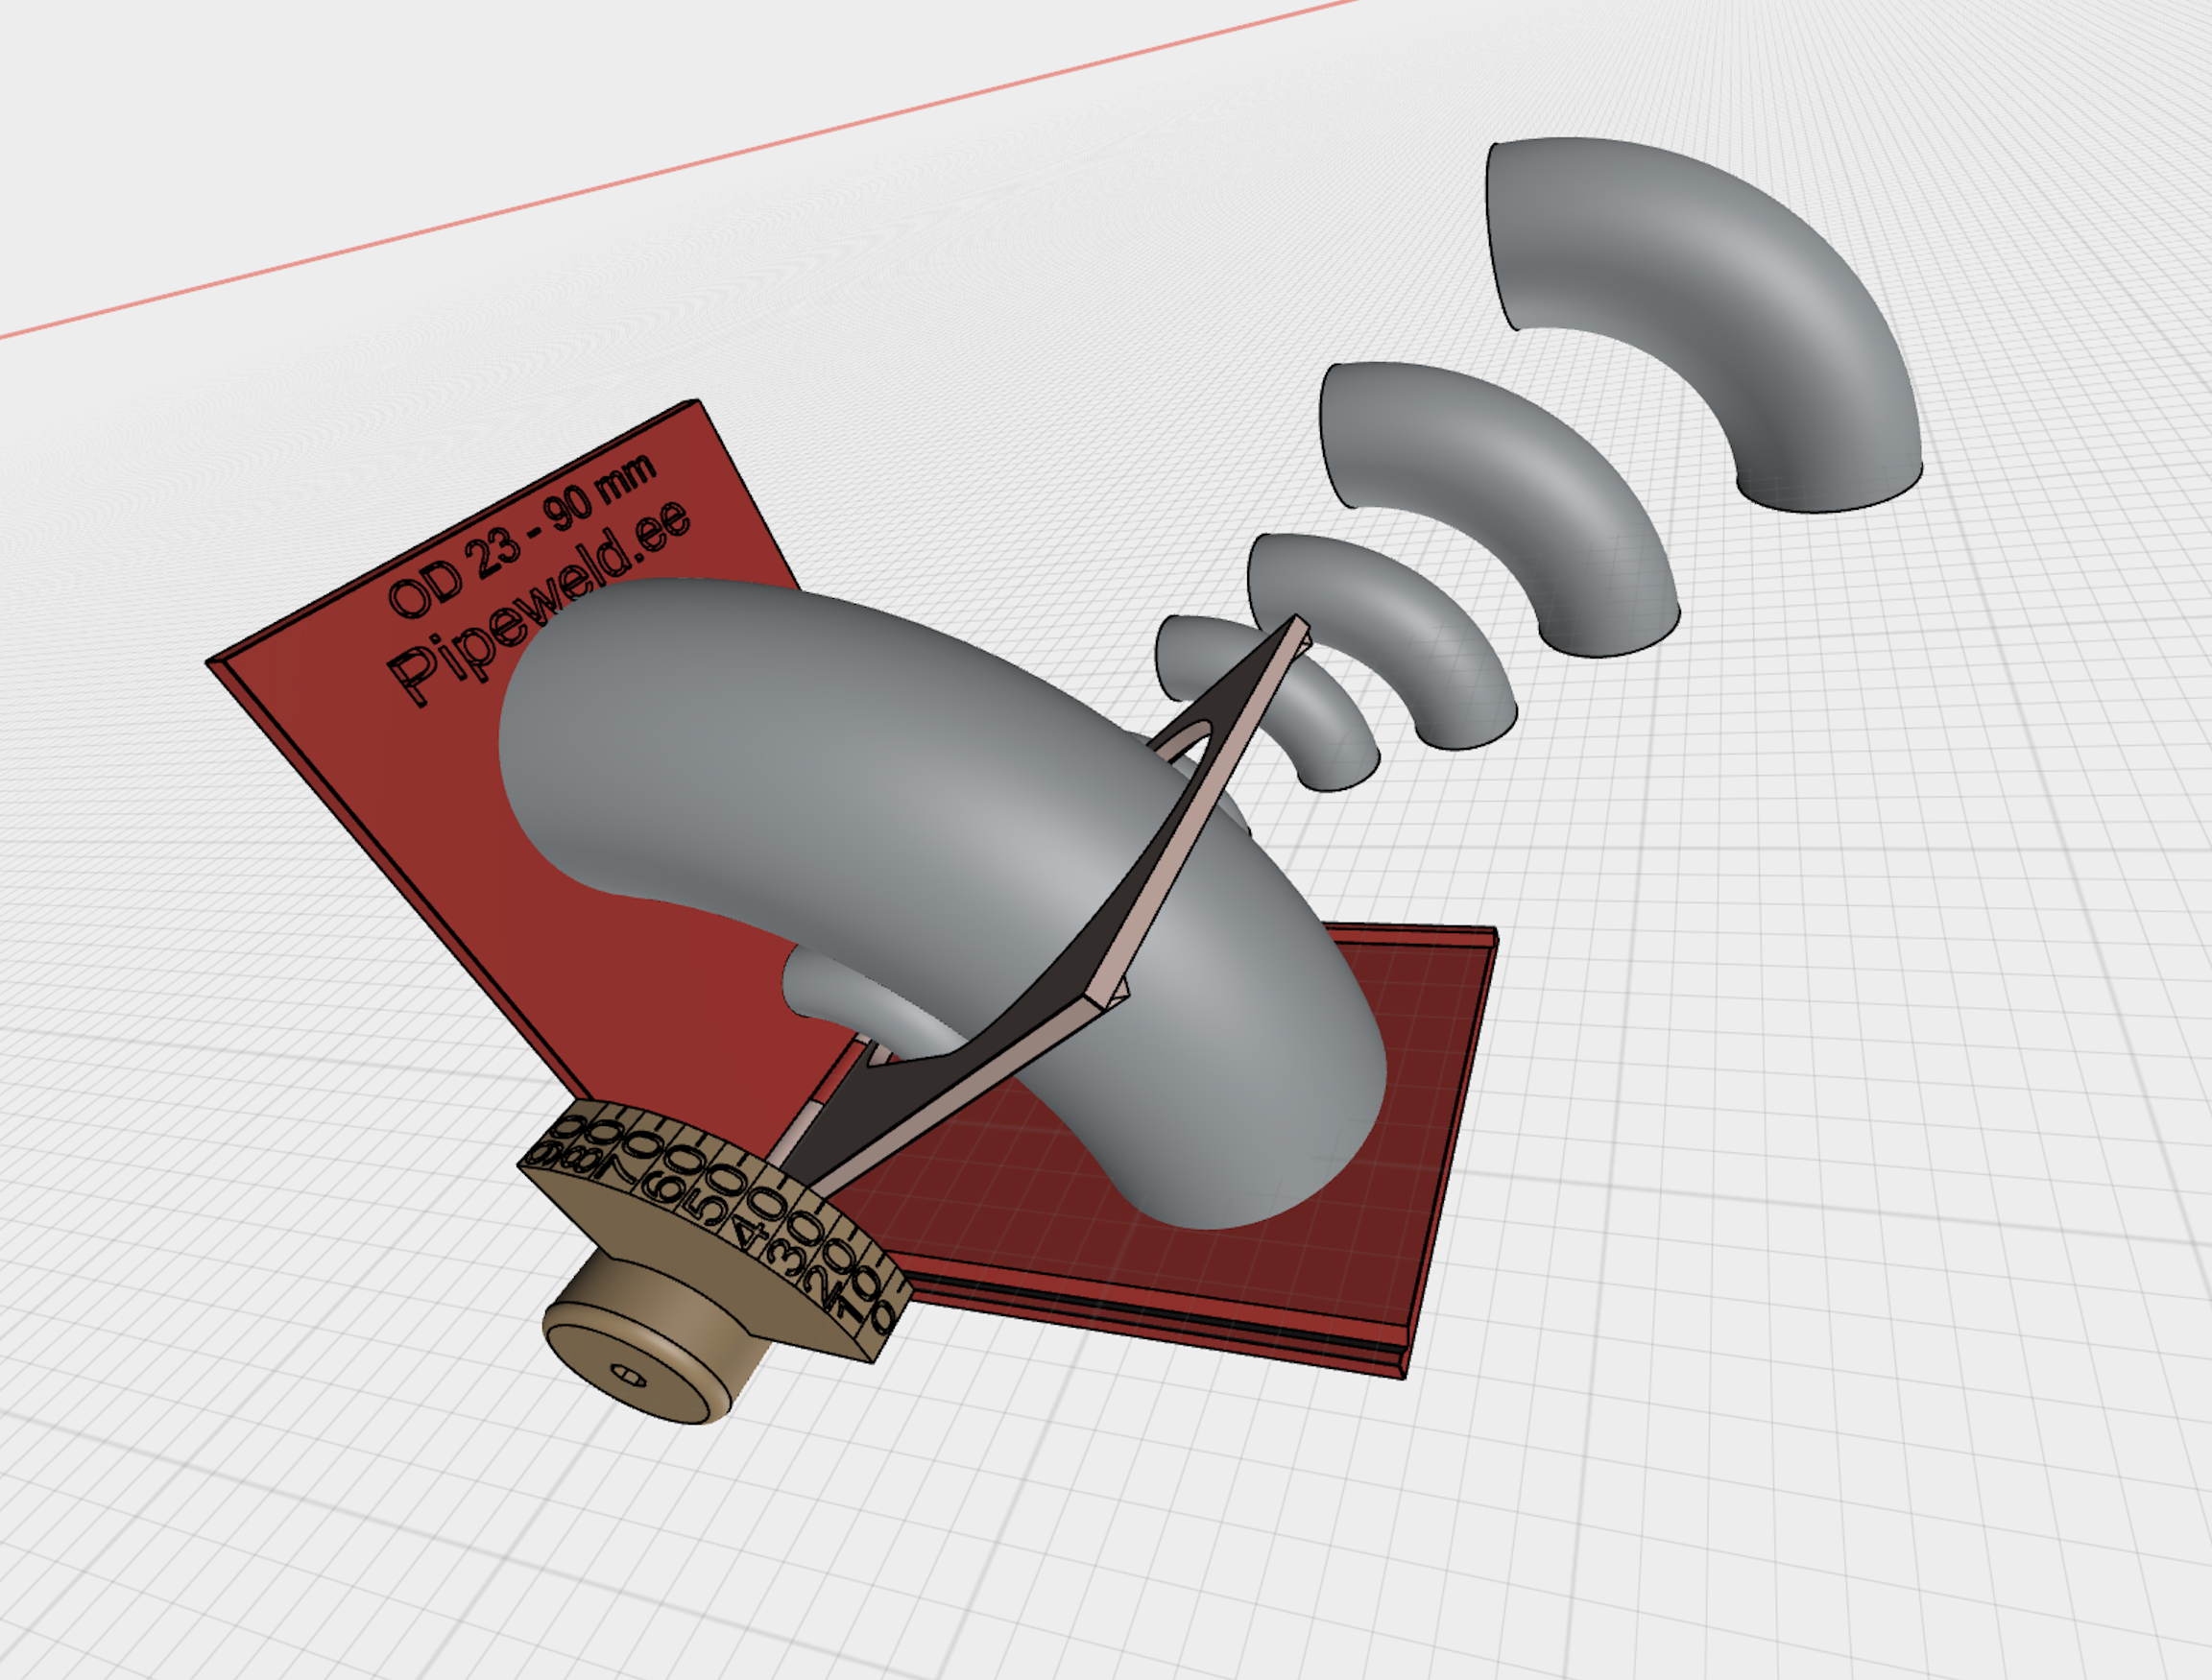
2. Laying a bend on the pipeline dead pipe ends.
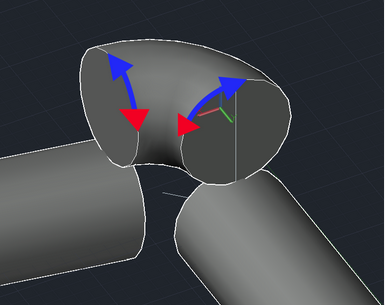
Lowering the bend on top of main pipe ends, at this point it is important for us:
choose the ideal bend position with a smaller fracture angle:
establish the alignment of the vertical axes of both sides relative to the extended ends:
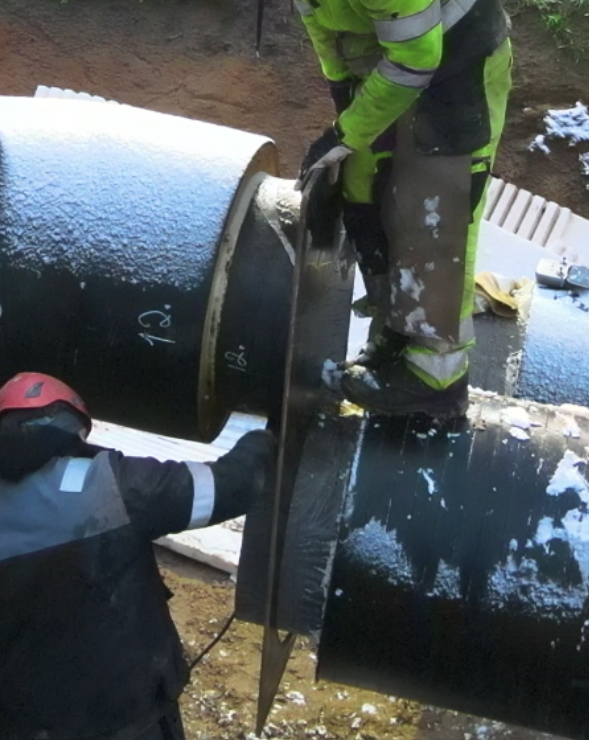
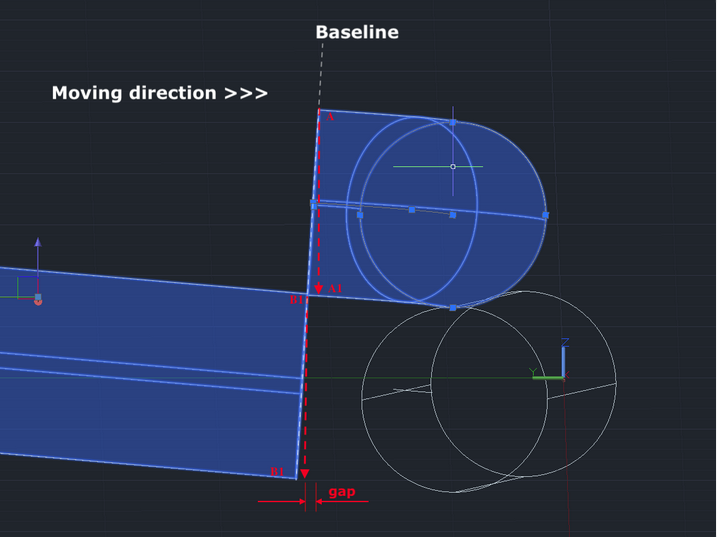
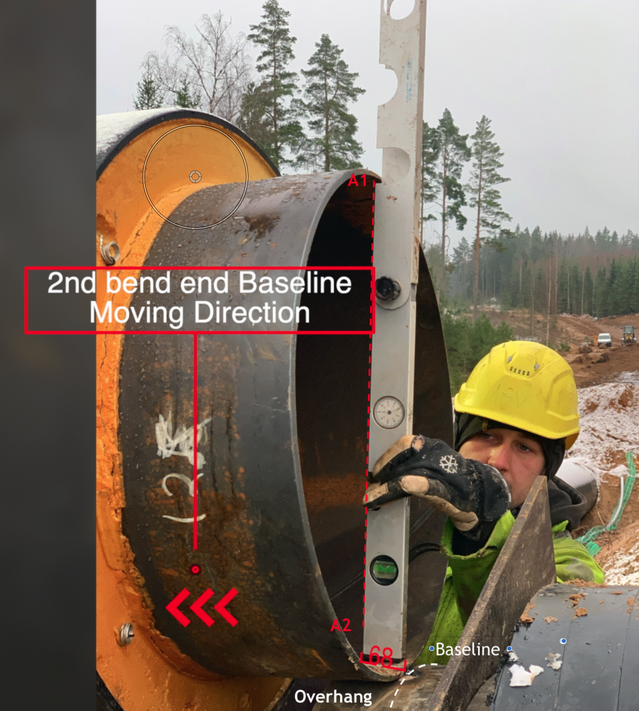
3. Baseline marking on technological pipeline
One apply plywood sights to both ends of the bend and can carefully transfer the baseline to the ends of the pipeline, but it is important not to rush to cut along the baseline.
4. How to make a golden joint and why not cut along the baseline?
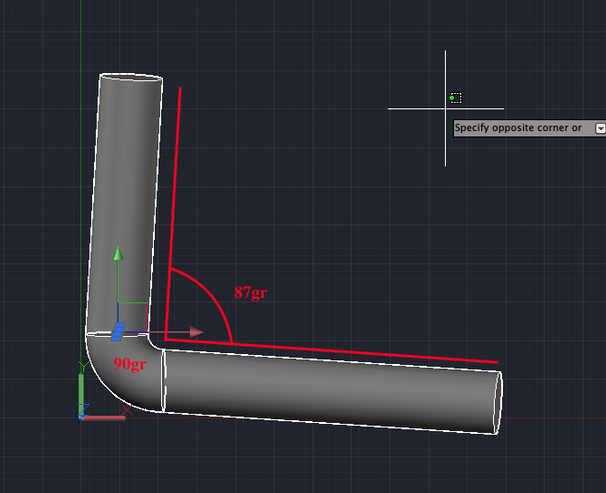
The thing is that we are considering the case when the axes of the pipeline do not meet in the center of the bend, along one of the three planes or along all three.
In other words, the ends are not laid correctly and there is no way to move them.
Explanations:
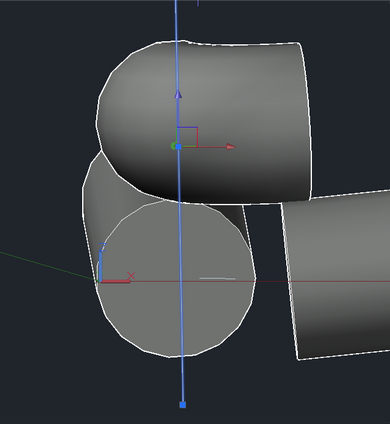
Since we are lowering the bend from above in a vertical plane (top view), in this plane it does not matter to us what error is along the axes, it can be 5 degrees or even more.
But in the horizontal plane (this is a side view) it is of great importance.
Since we will lower the bend directly perpendicular to the ground. Then point A will be transferred to A1, and point B will be transferred to B1, in this example we see the reason for the formation of a critical gap, indicated by GAP in the figure.
5. Transferring the baseline to the location of the actual pipeline cut
In this example, you need to move the baseline (Baseline) by GAP distances, in the direction to the right, see the arrow (moving direction >>>)
It is important to understand that the opposite phenomenon can also occur when an overhang is formed, and not a gap.
In this case, you need to move the baseline (Baseline) by distances (Overhang) in the direction to the left, see the arrow (moving direction <<<)
6. Technology of transferring the baseline to the place of the actual cut.
You can use a plywood scope to transfer the actual cut baseline.
7. Fitting parts and cutting the pipeline.
After you can make cuts along the mixed baseline, and already begin to apply a bend to the pipe strings, you may find some minor errors that are leveled out as part of the locksmith fit.
It is important to understand that the bend must come into place in exactly the same spatial position as you installed it in paragraph 2 (Laying the bend on the pipe string) of this instruction. To do this, it is advisable not to remove the bend from the sling during the entire installation, or to make marks.
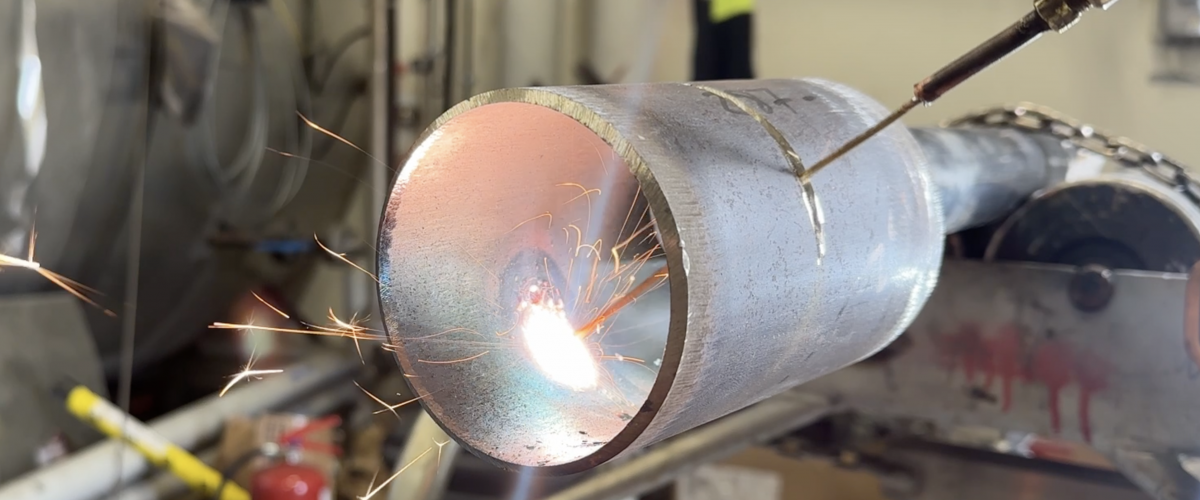
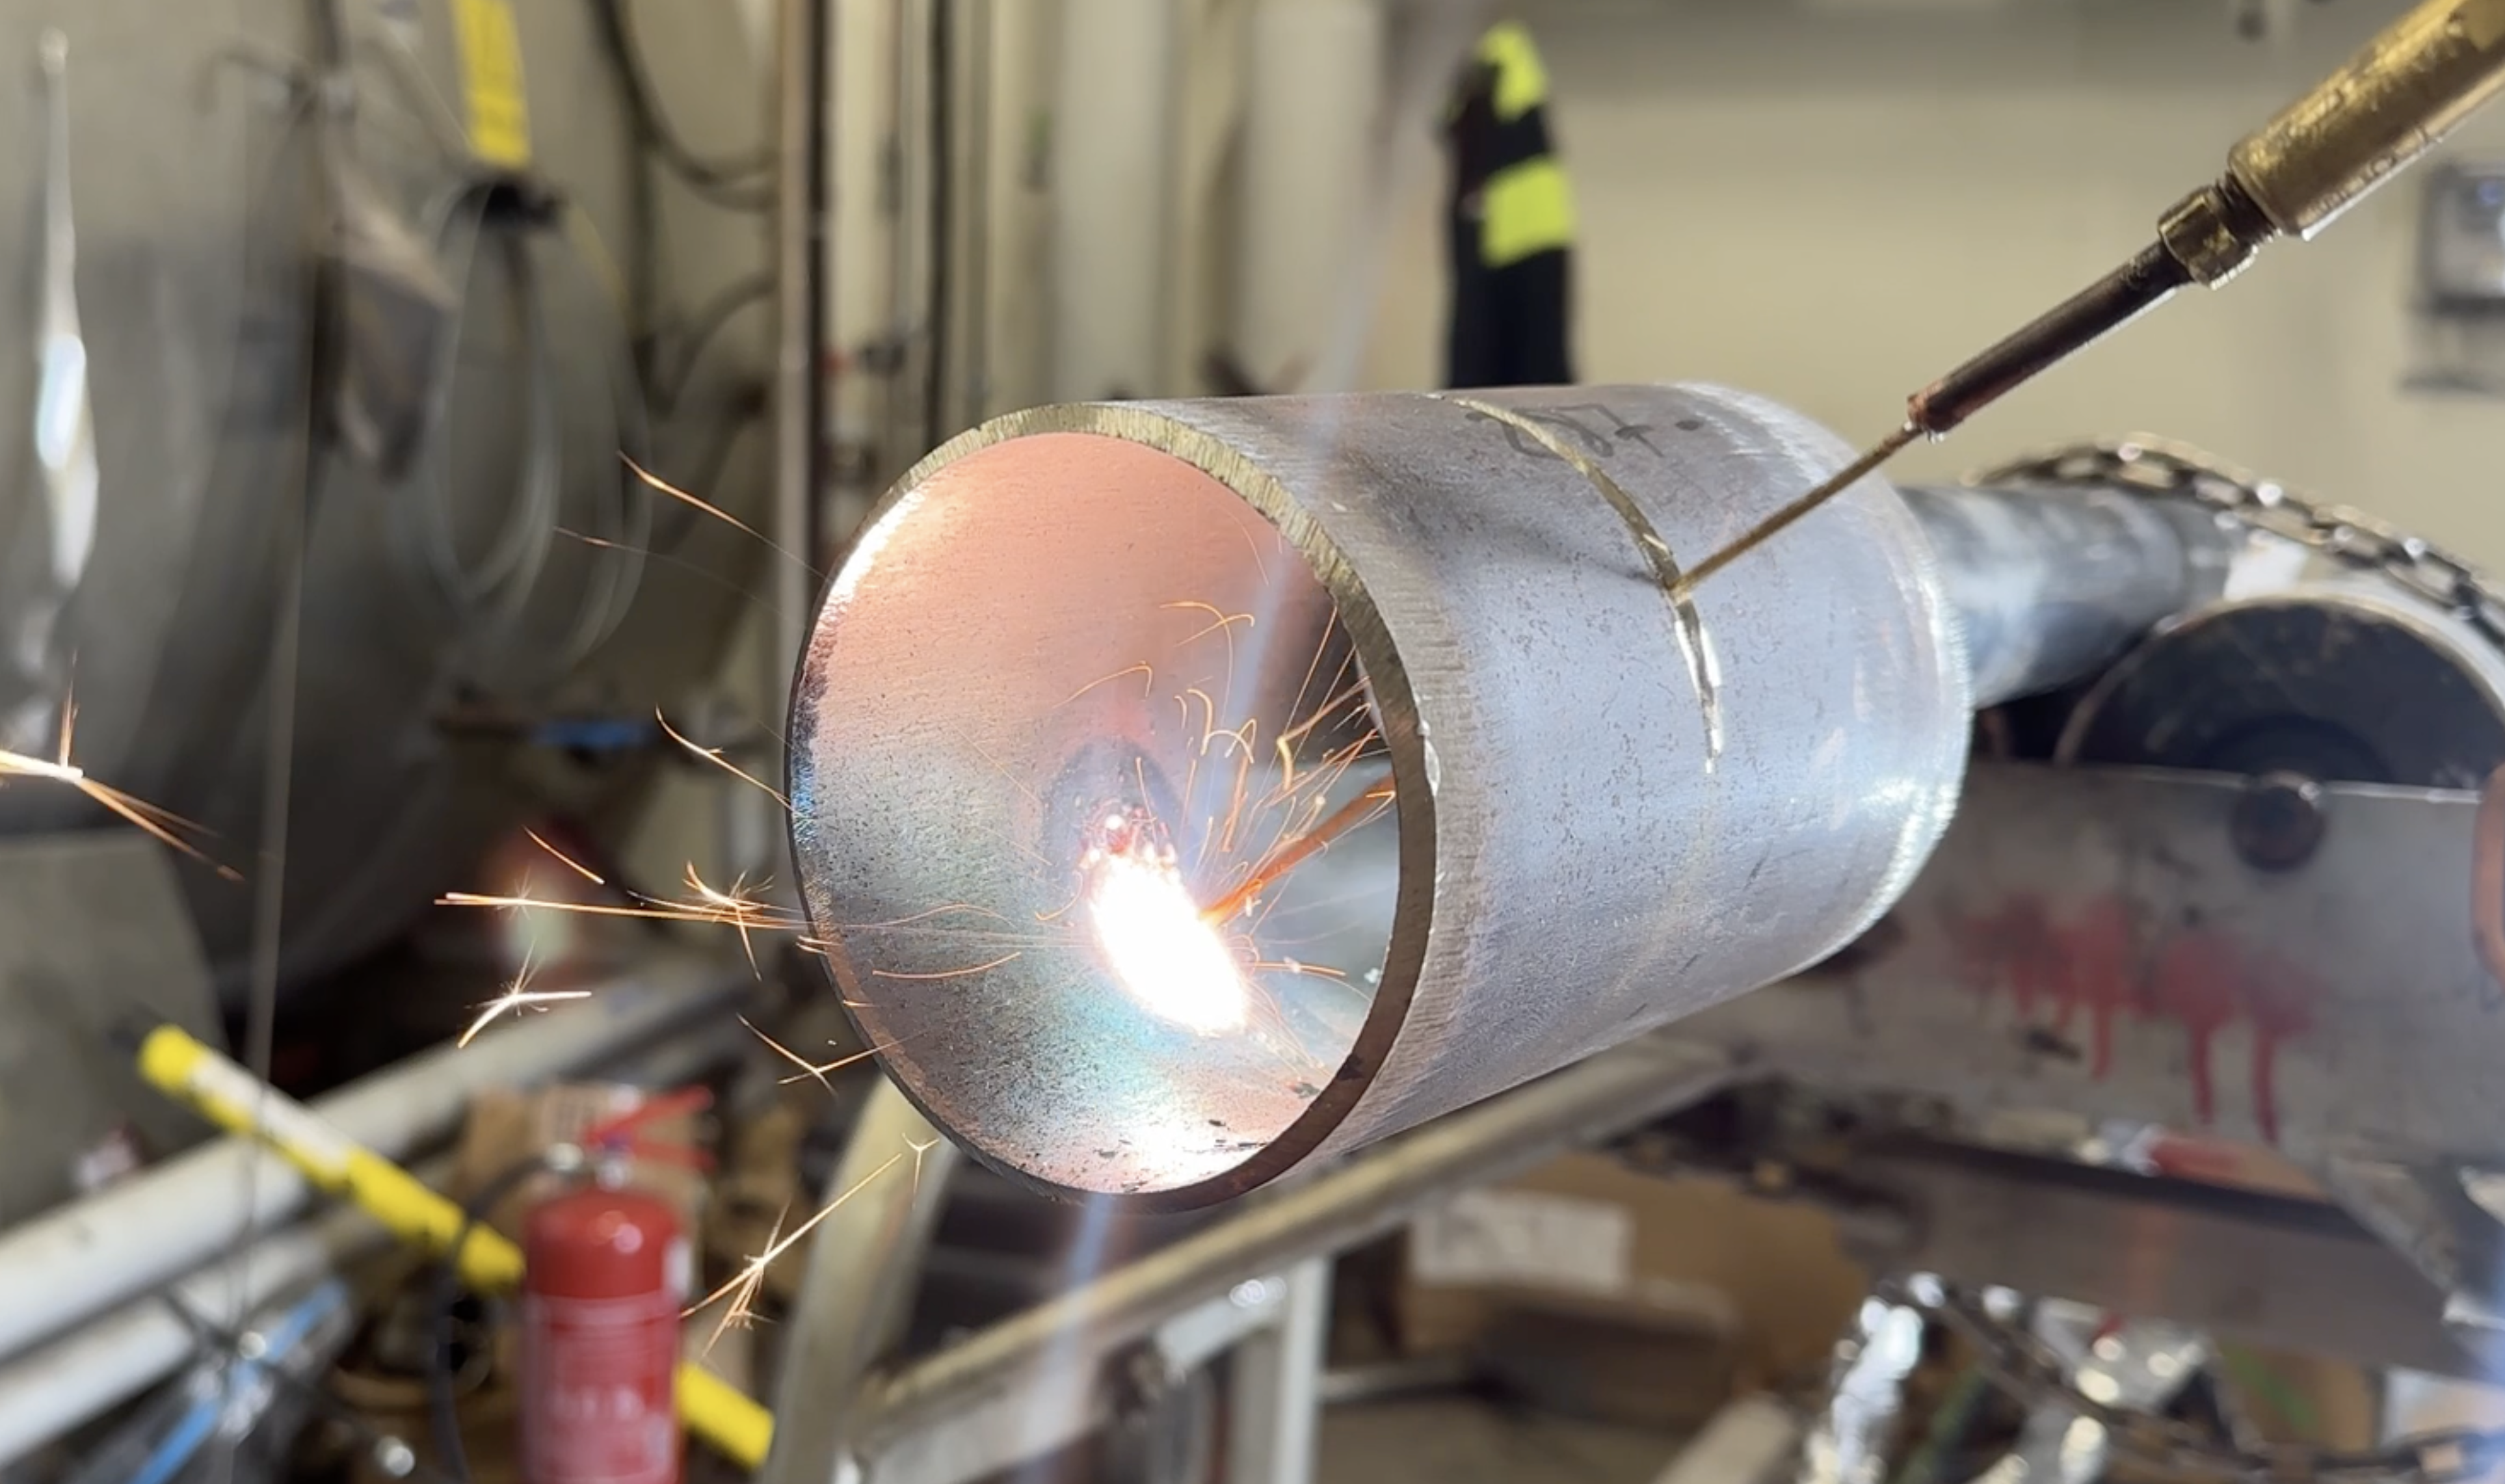
8. Tie-in and bend mounting of golden joints
After all the operations done, the last installation of the bend remains, it must be performed by a specialist installer.
9. Here is another way to use these simple tools for tapping into straight sections.
We use cookies to ensure that we give you the best experience on our website. If you continue to use this site we will assume that you are happy with it.Ok


